DESIGN • PRODUCTION ART • HANDMADE

Crest, Stencil, and Sign
Omega Psi Phi (Tokyo chapter)
Project: stencil and hand-painted sign
My role: creation of a composite crest design from different reference images, physical production of a plastic stencil in two sizes, and hand painting one wooden sign
Design
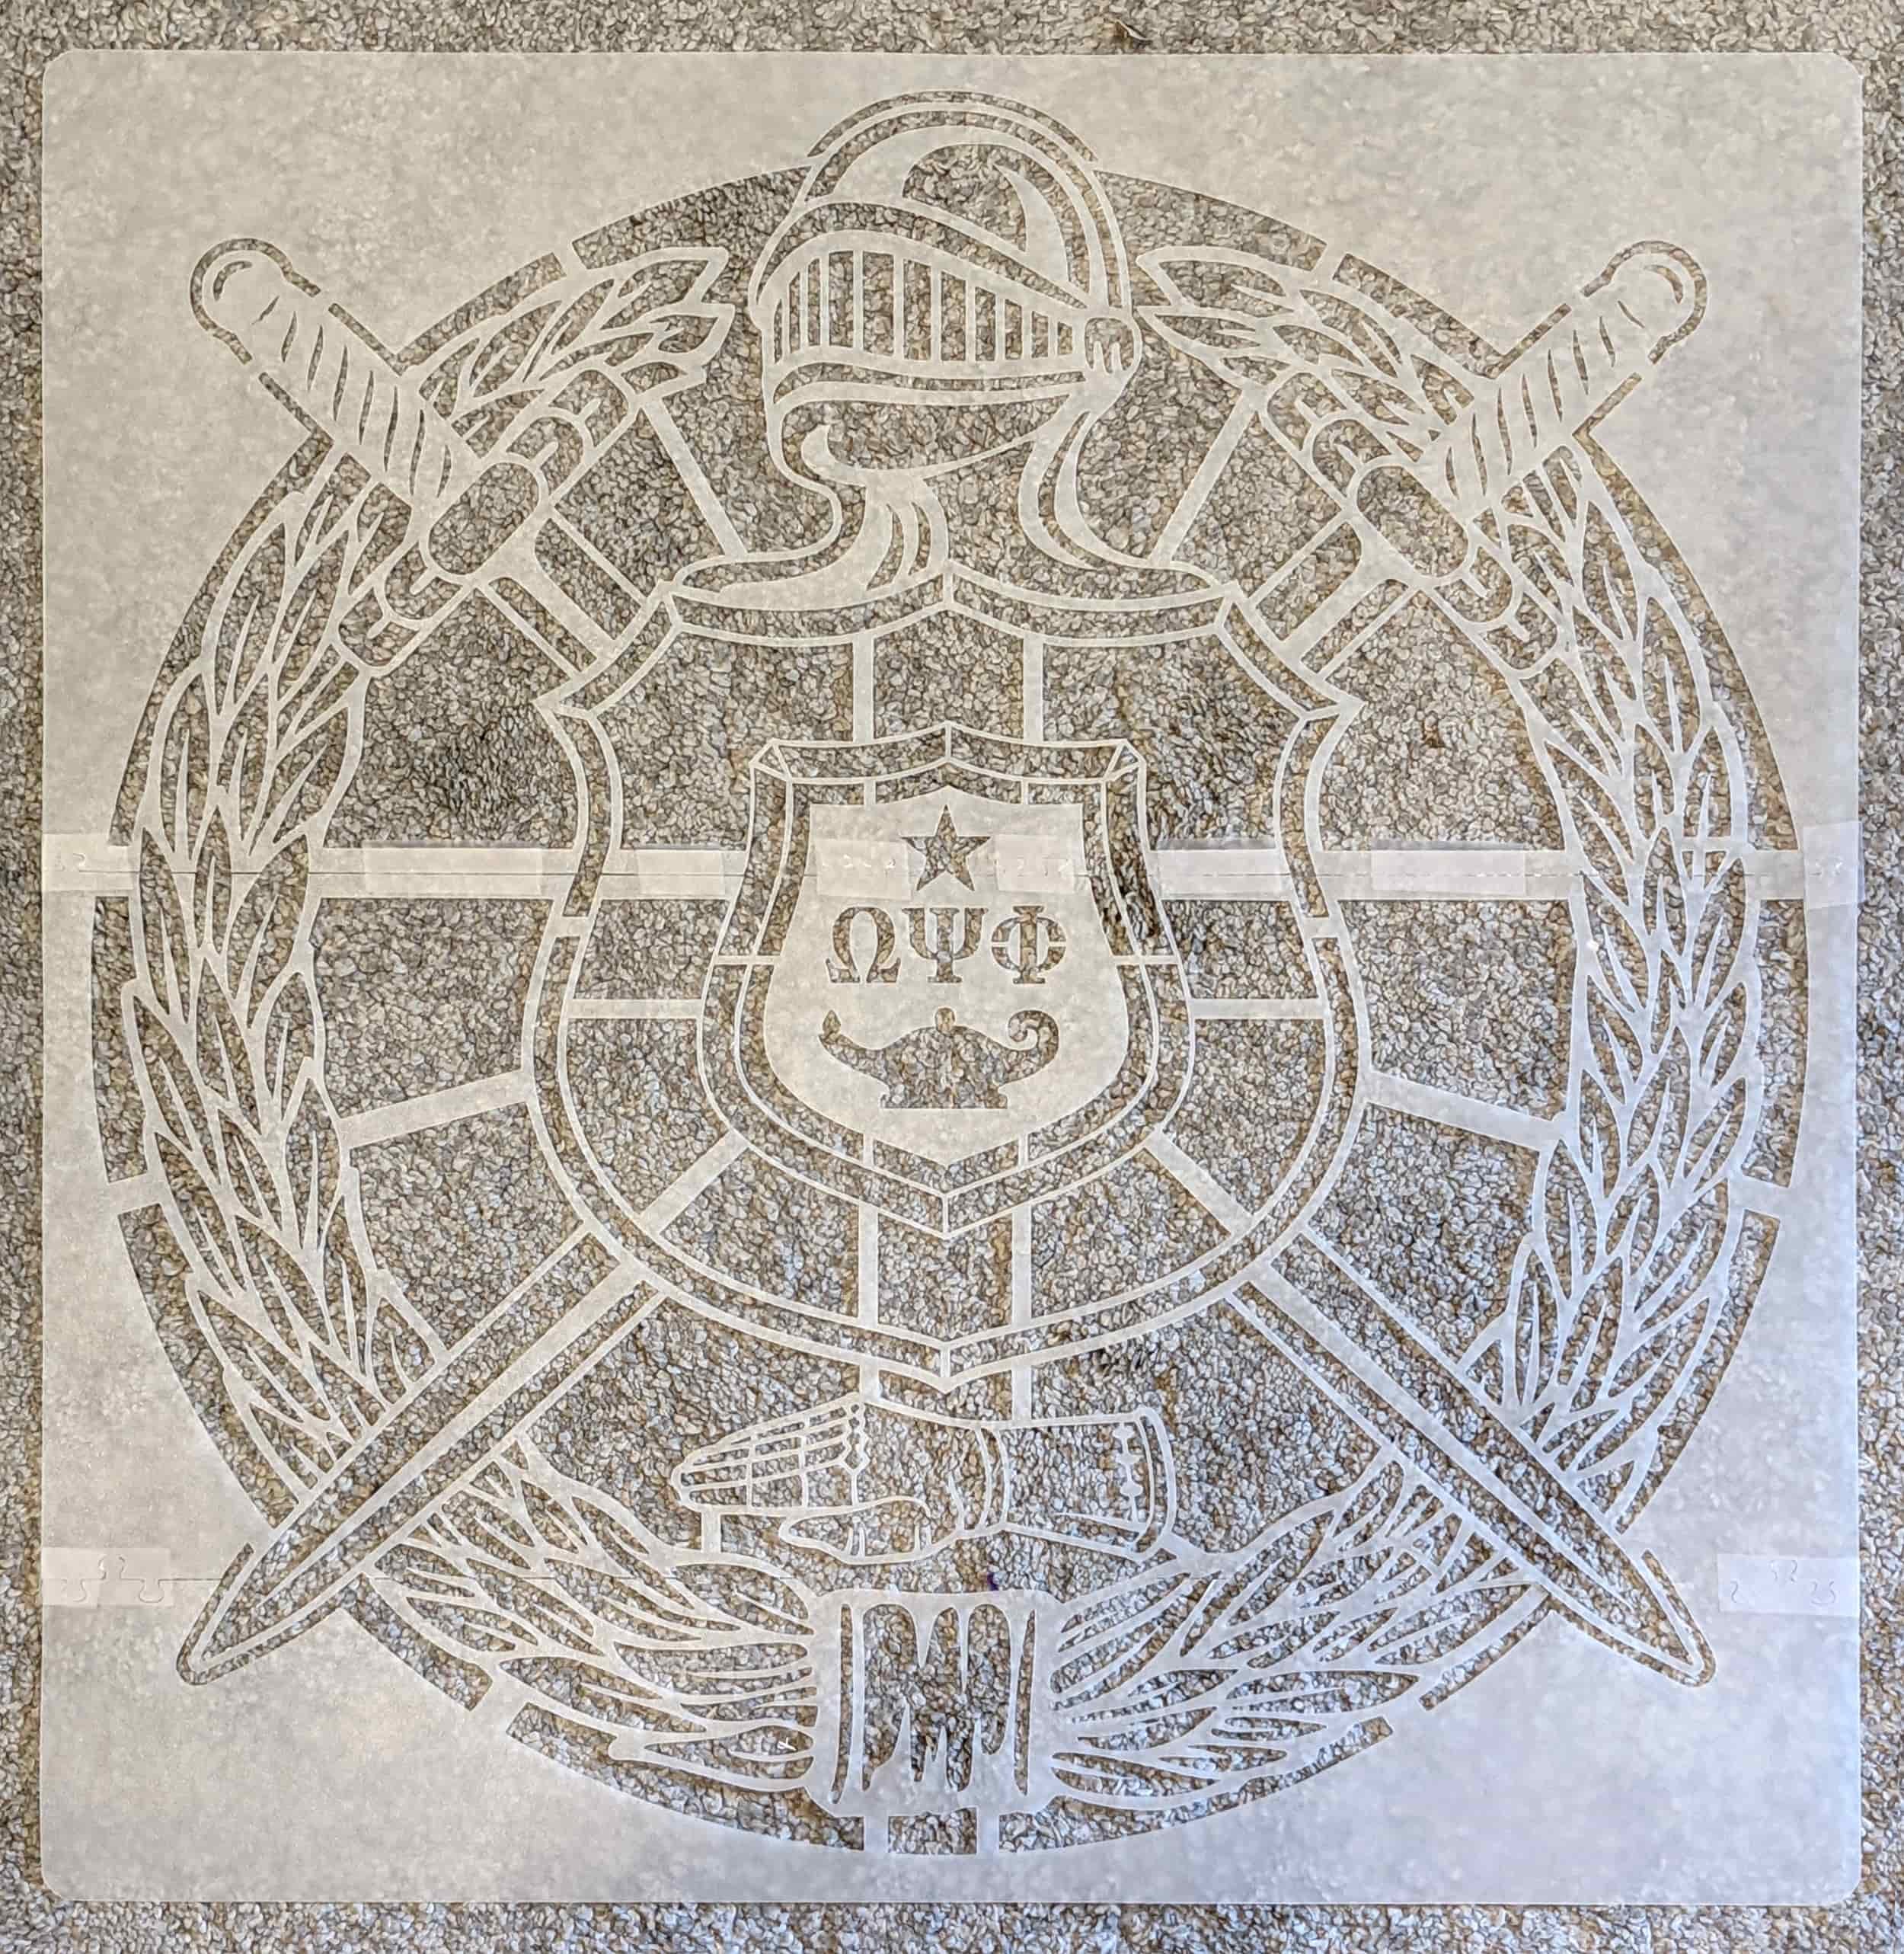
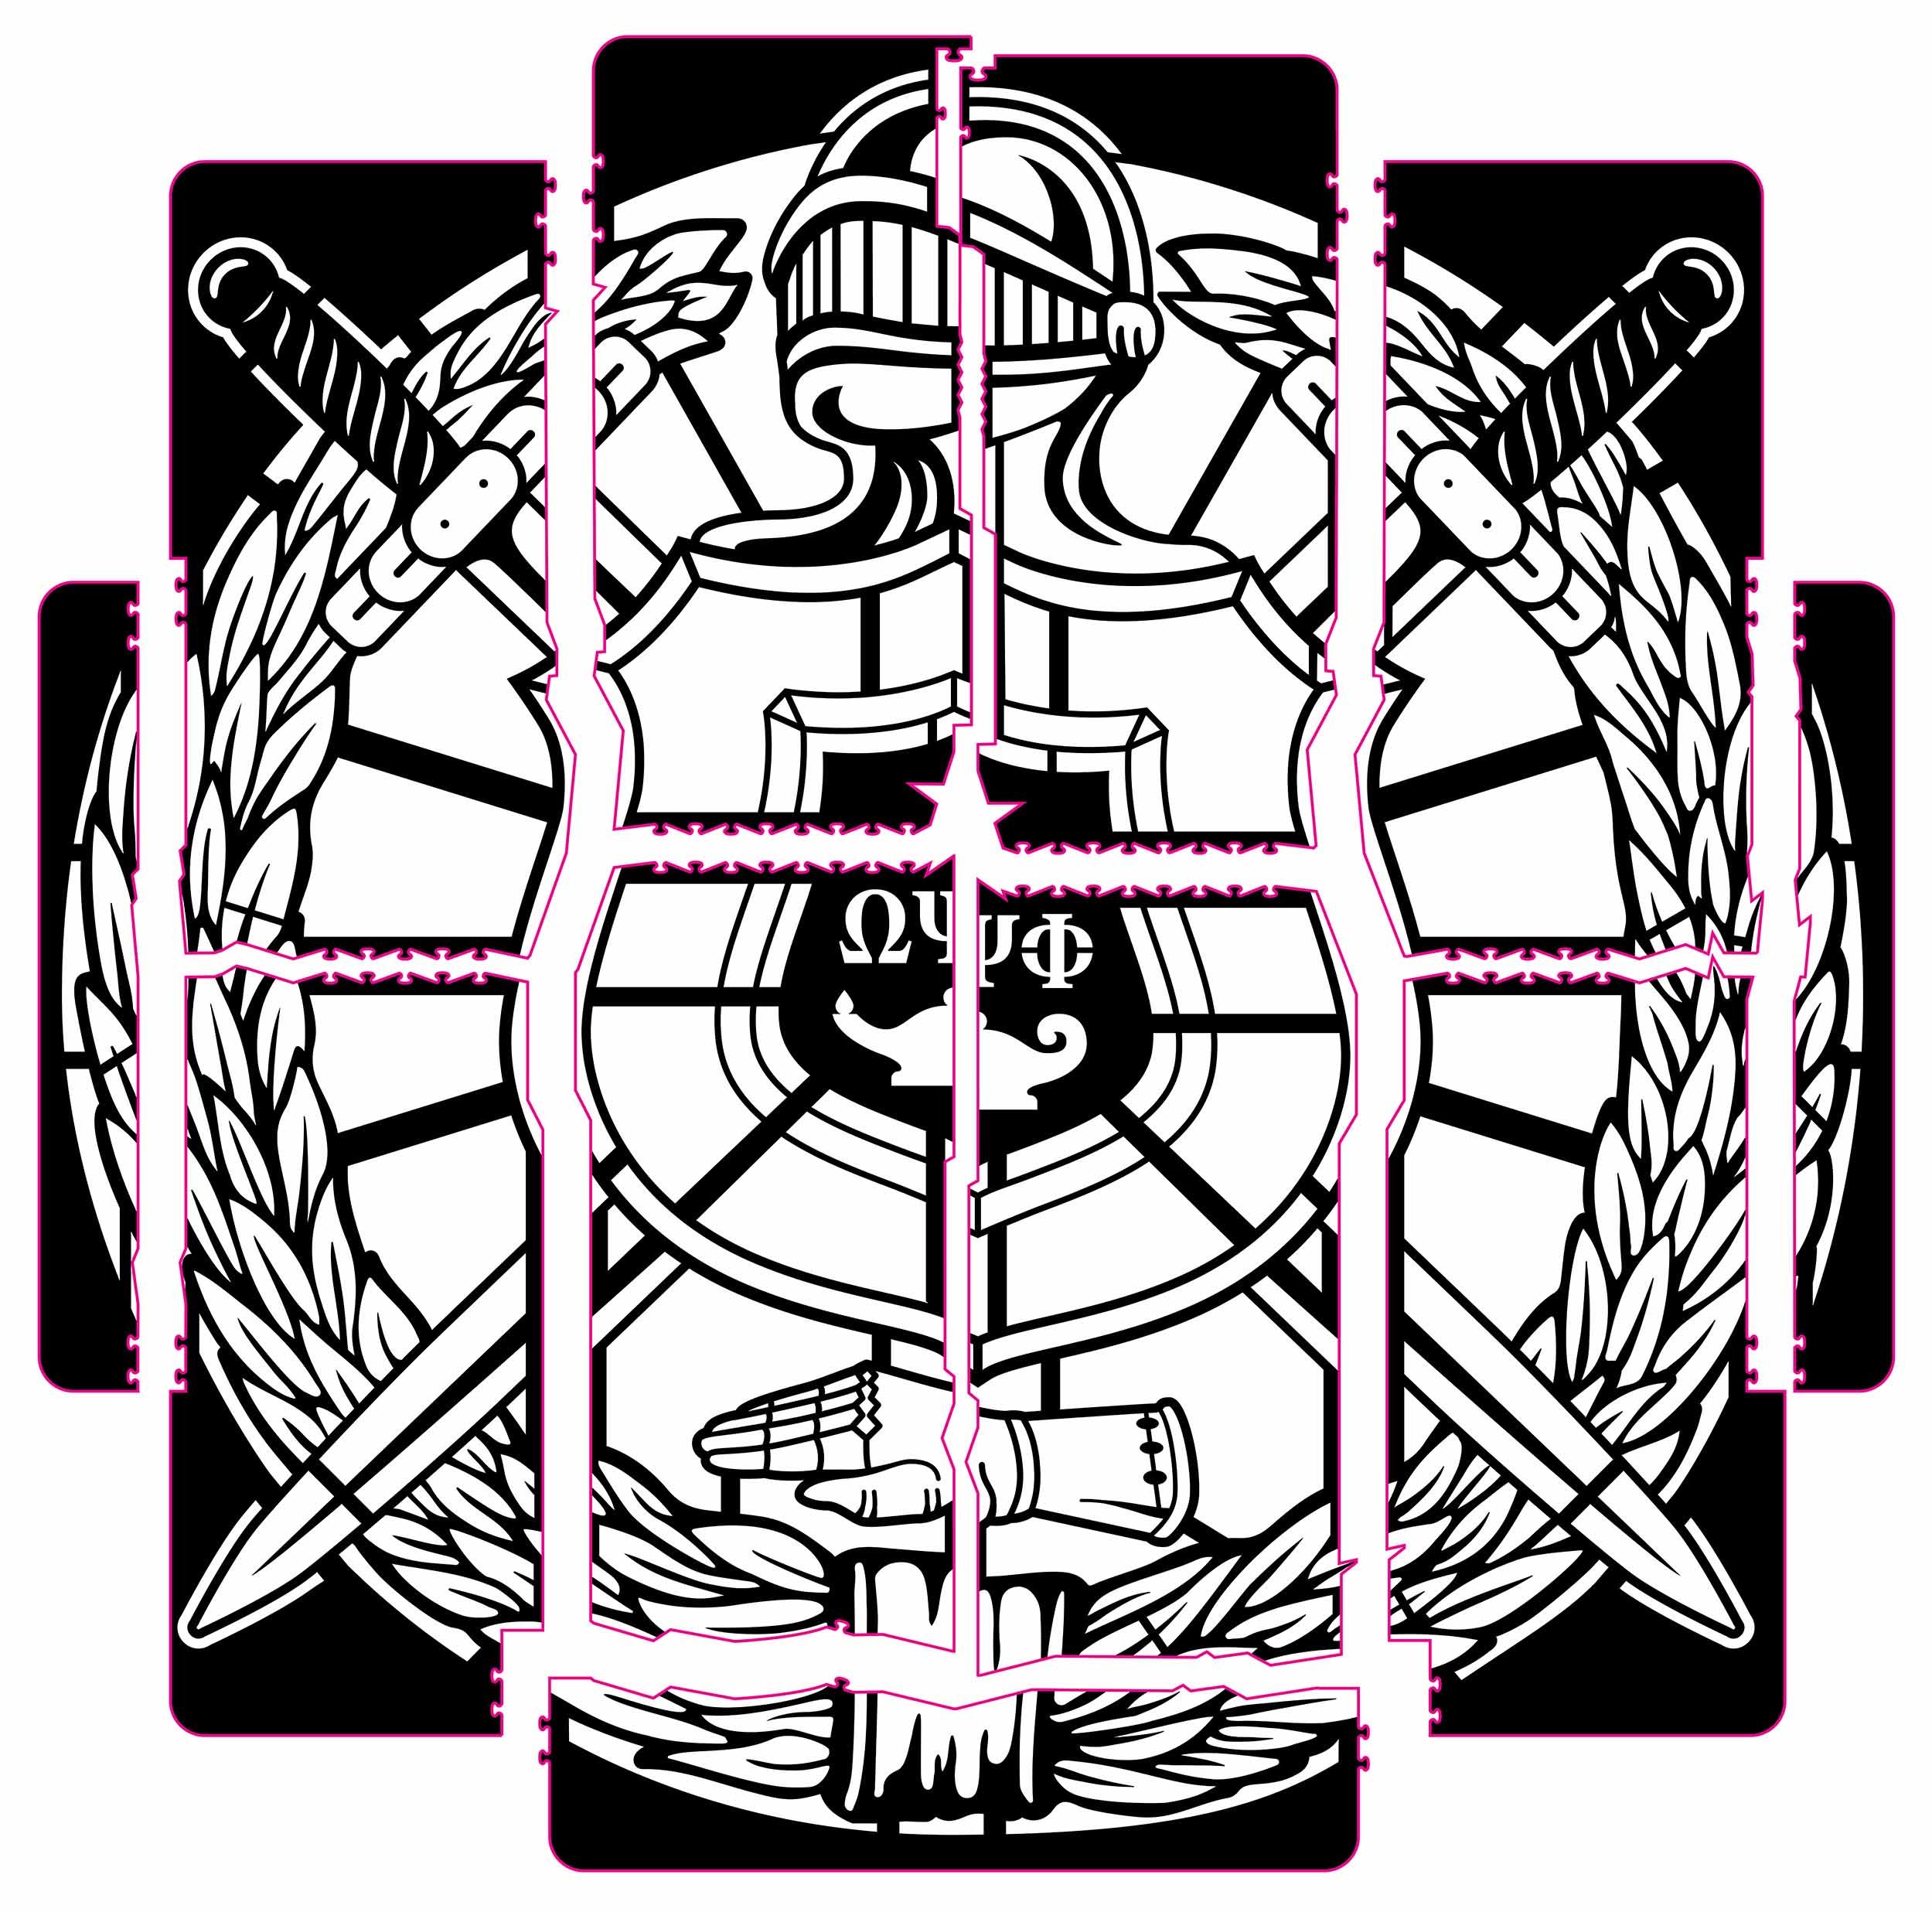
There were some challenges to think through from the beginning, knowing that the primary goal was to create two identical stencils at different sizes, 2 feet wide and 4 feet wide. I don’t usually work on this scale as a solo freelancer or in these materials (plastic/wood), so there were a number of unusual decisions to make between the design and production phases.
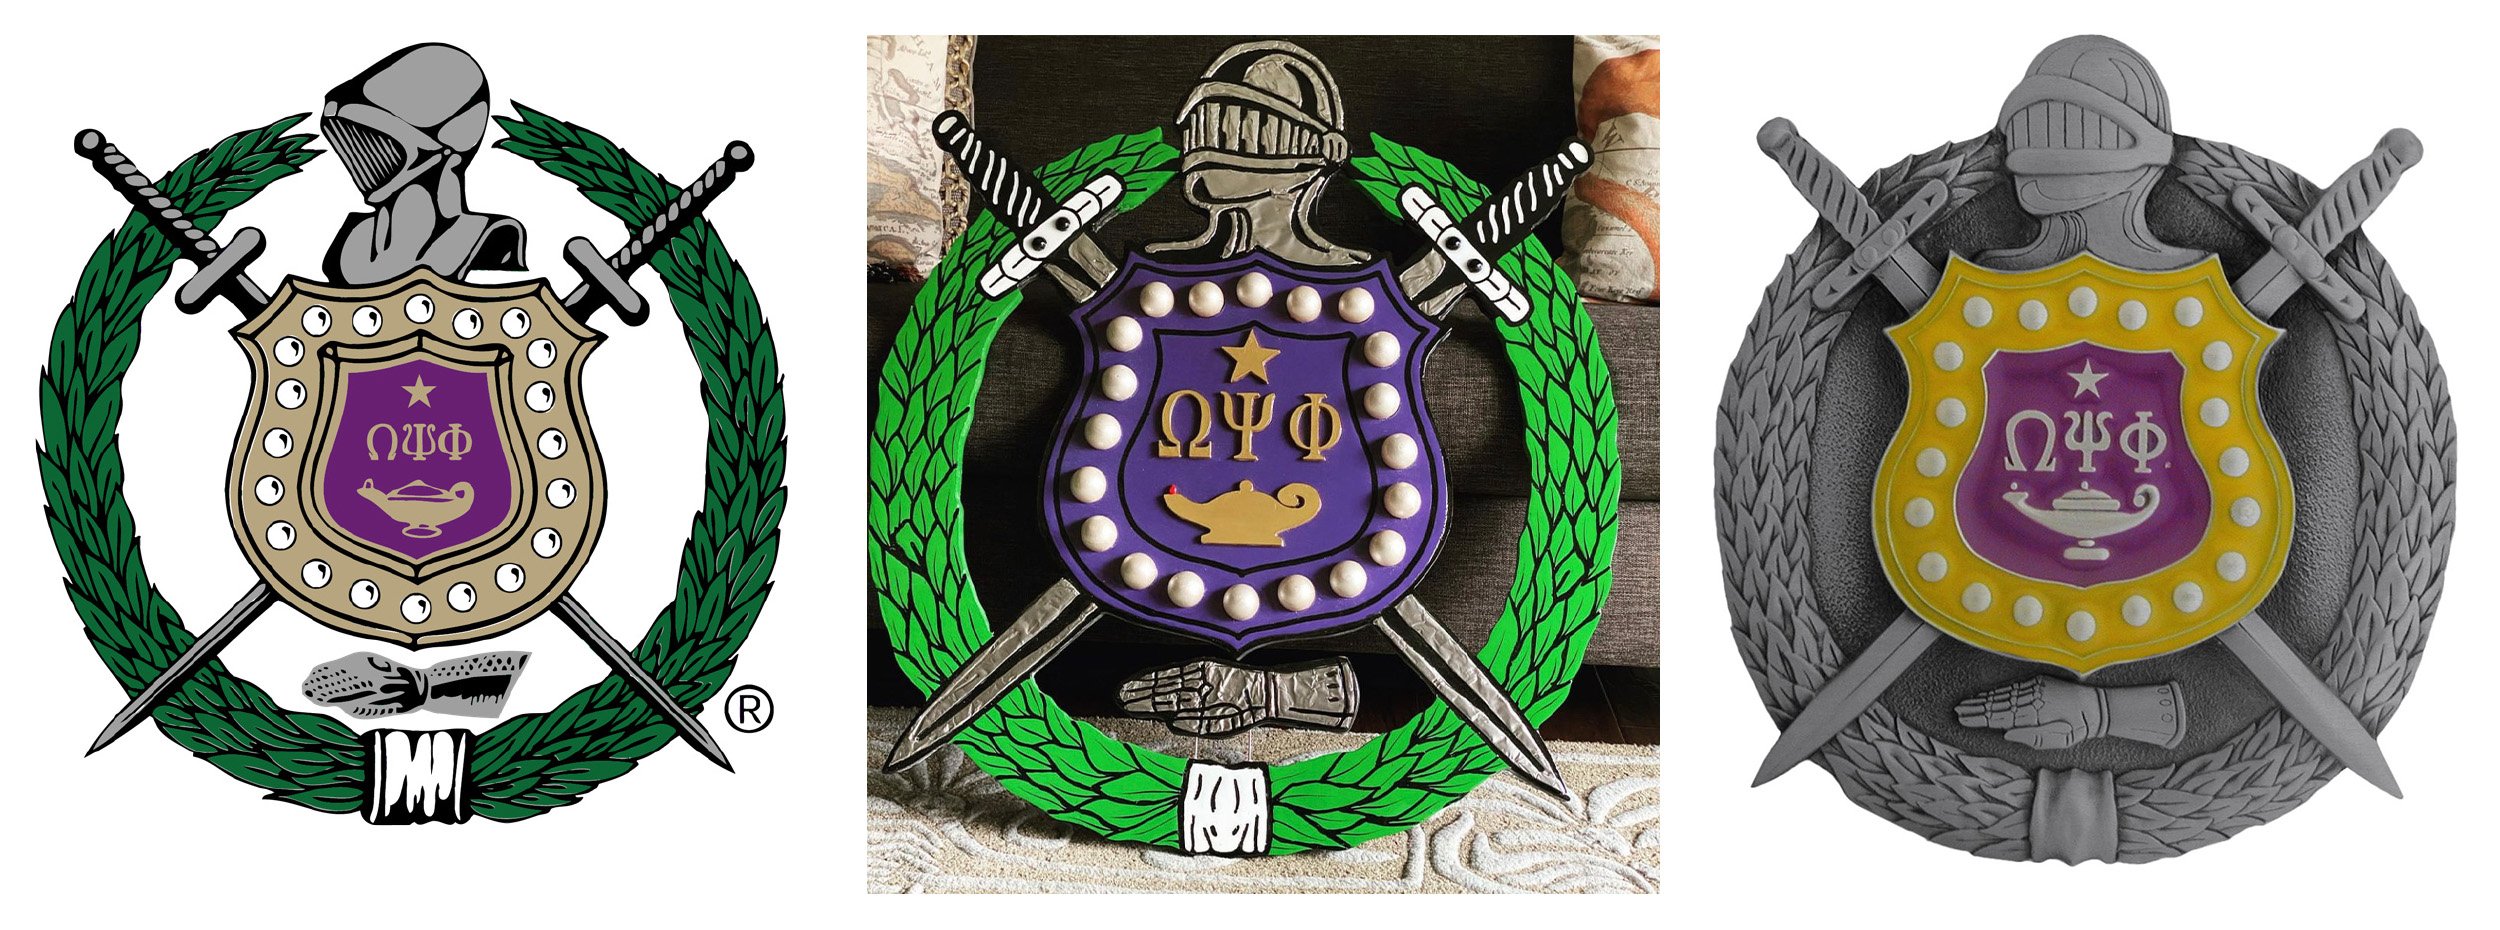
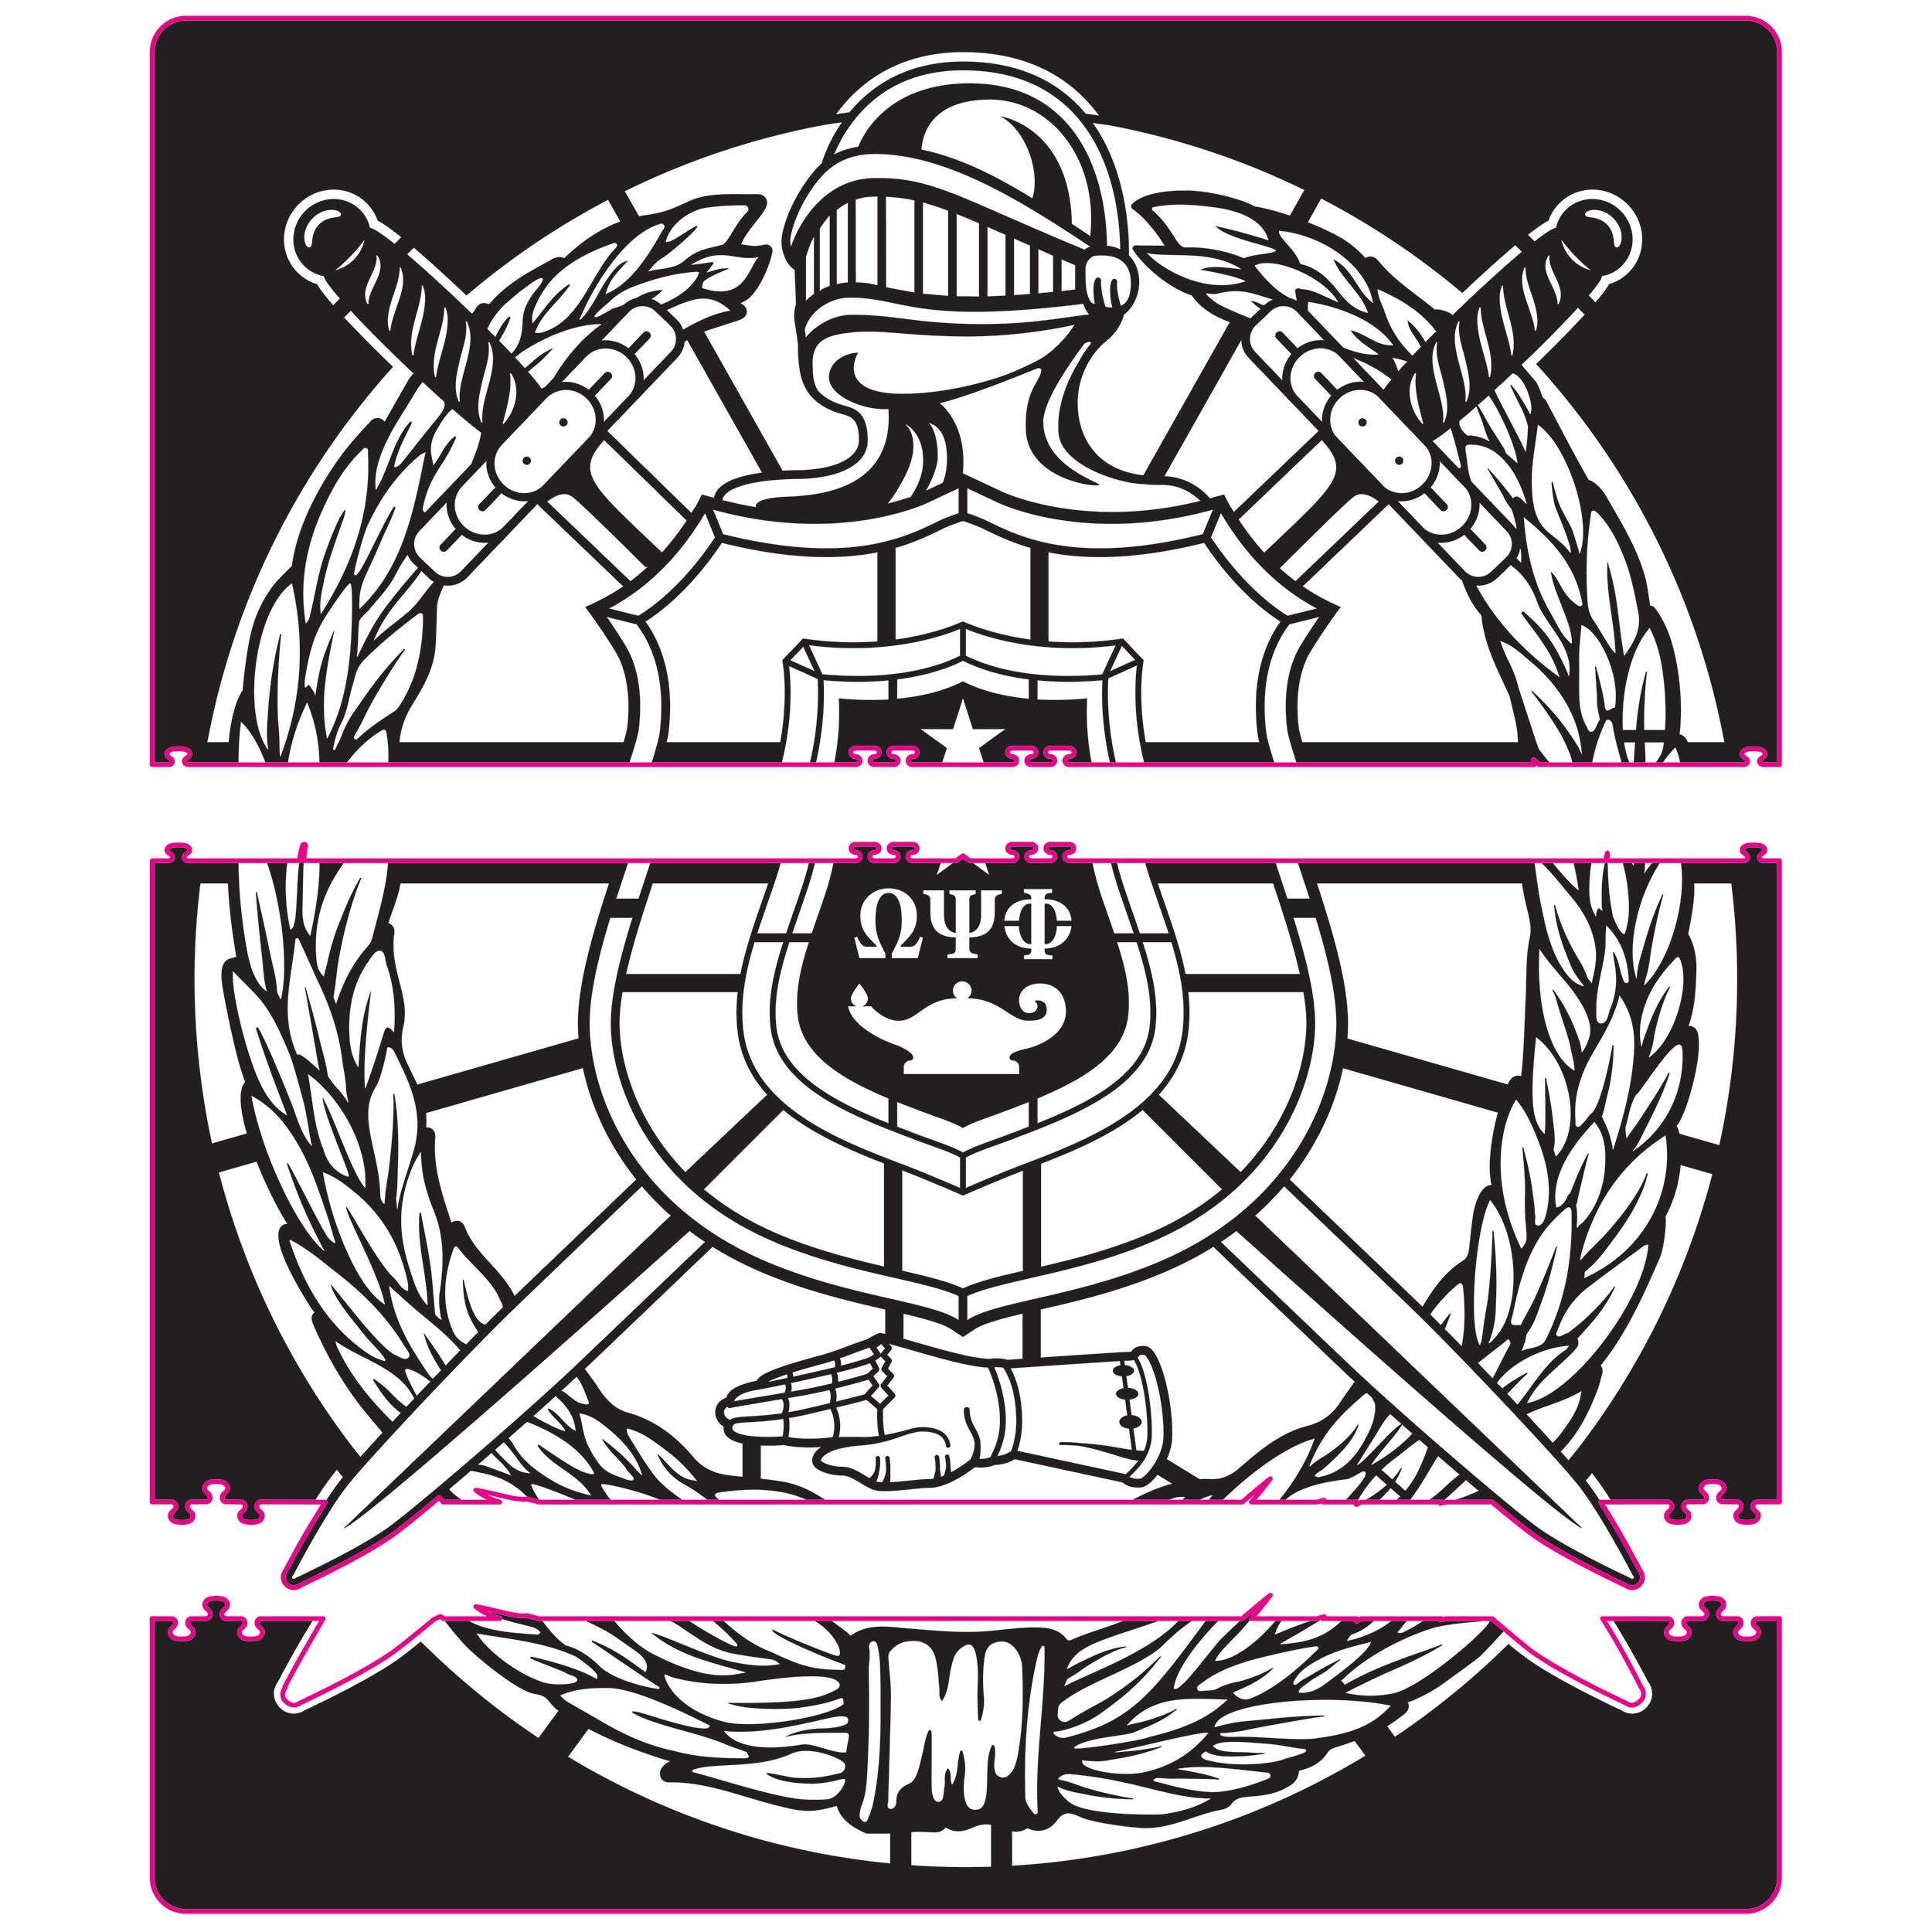
For the design, I worked from three different versions of the image to get all the client’s desired features together. The helmet design came from one, the leaves and shield from another, and the glove from a third.
Support pieces and interlocking shapes were added in for production (see next section).
Attributions
Top left: official design and brand guidelines volume 1.1 from https://oppf.org/
Top center: theshieldmaker
Top right: wallpaperuse.com
Bottom: final design approved by the client
Production
There was significant research and experimentation with different ways to physically produce the stencil. The client wanted the stencil to be as durable as possible, so we opted for the thickest plastic that I could work with rather than card stock. Maker spaces did not offer a work space large enough to produce the stencil at either of the final sizes and generally focused on laser cutting, which is quite a bad idea for most types of plastic because of the fumes released. Ultimately I opted to produce it at home.
I use a Cricut, but because it also has a limited work area size, I needed to split the design into segments that were easy to reassemble once cut. On the plus side, the ability to break down a large stencil makes the end product much easier to store.
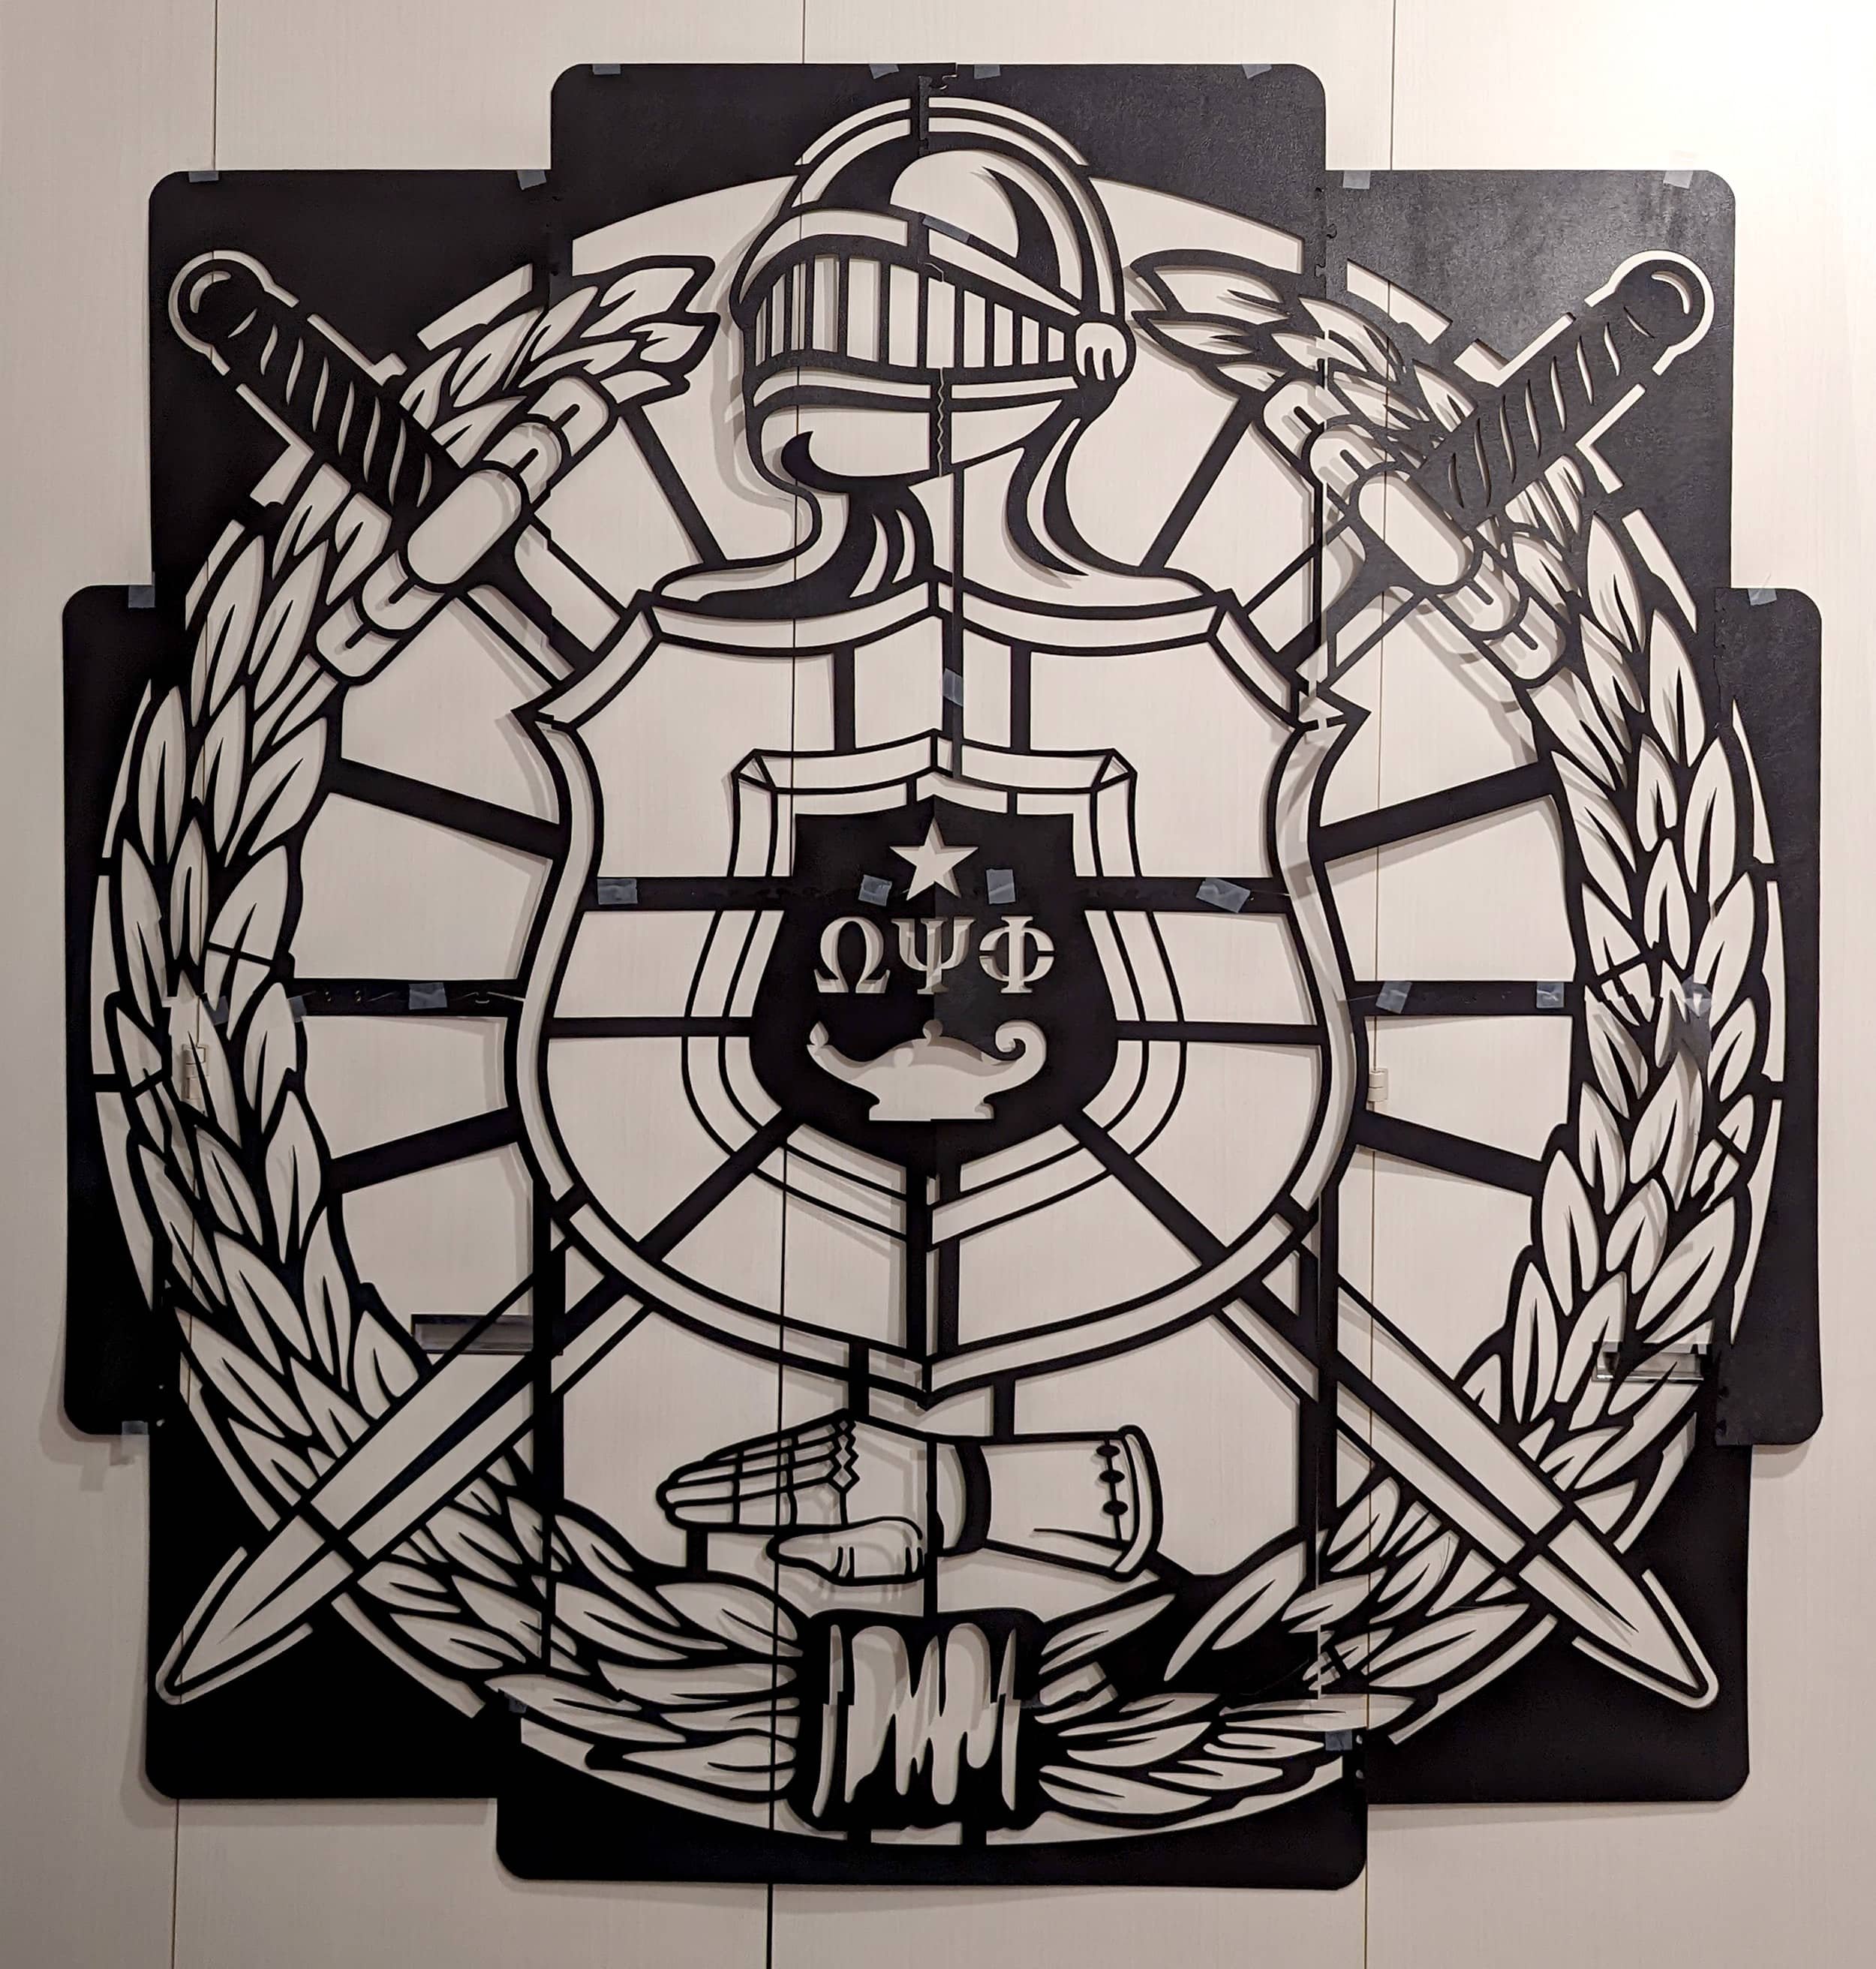
I was not able to cut the stencil from rigid or very thick plastic like acrylic, so my solution was to cut two copies from the best plastic sheeting I could find (based on original sheet size, availability, durability, and cost) and glue them together. Interlocking shapes were included in the edges of each piece to help with placement and assembly.
For both sizes, a secondary stencil was cut to help with size and placement of the pearls (not shown).
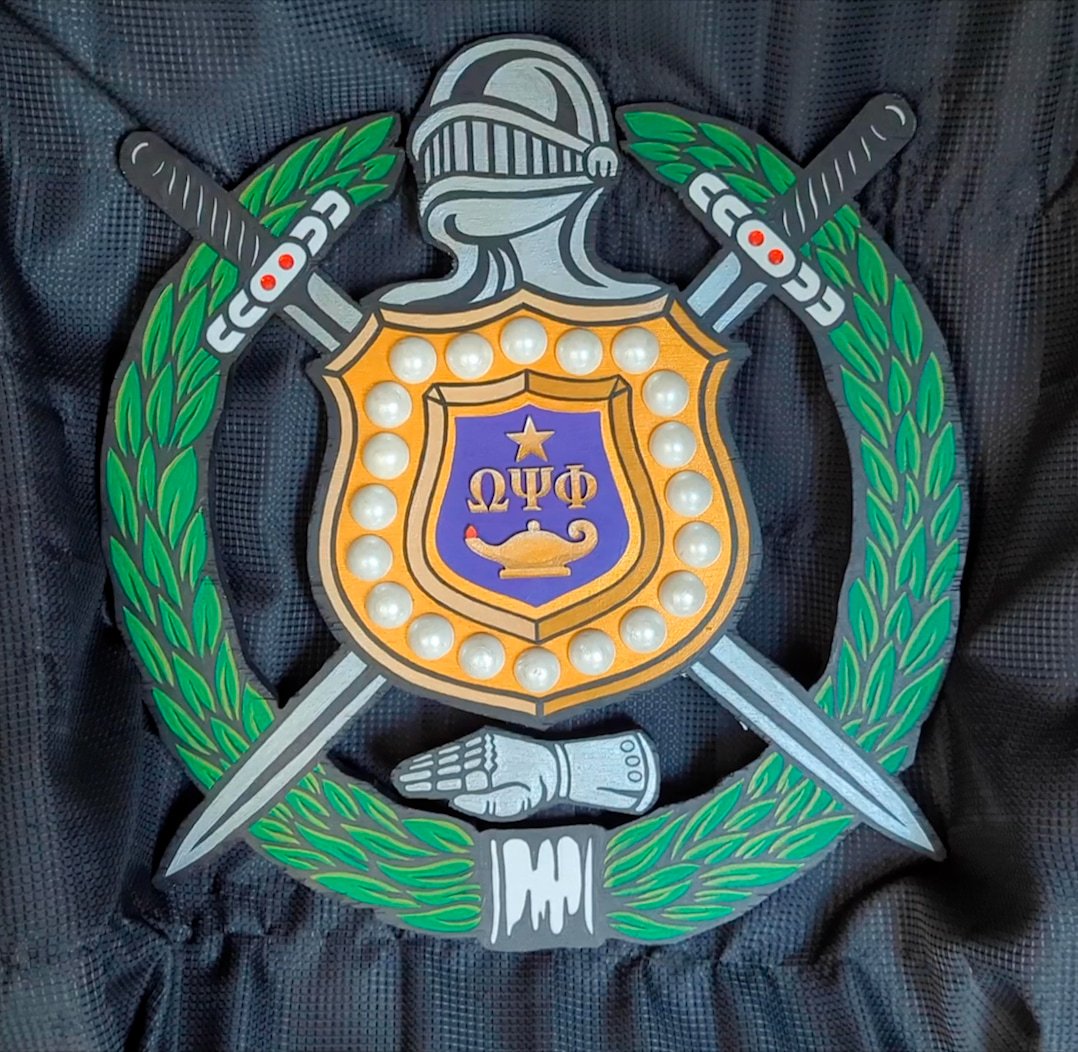
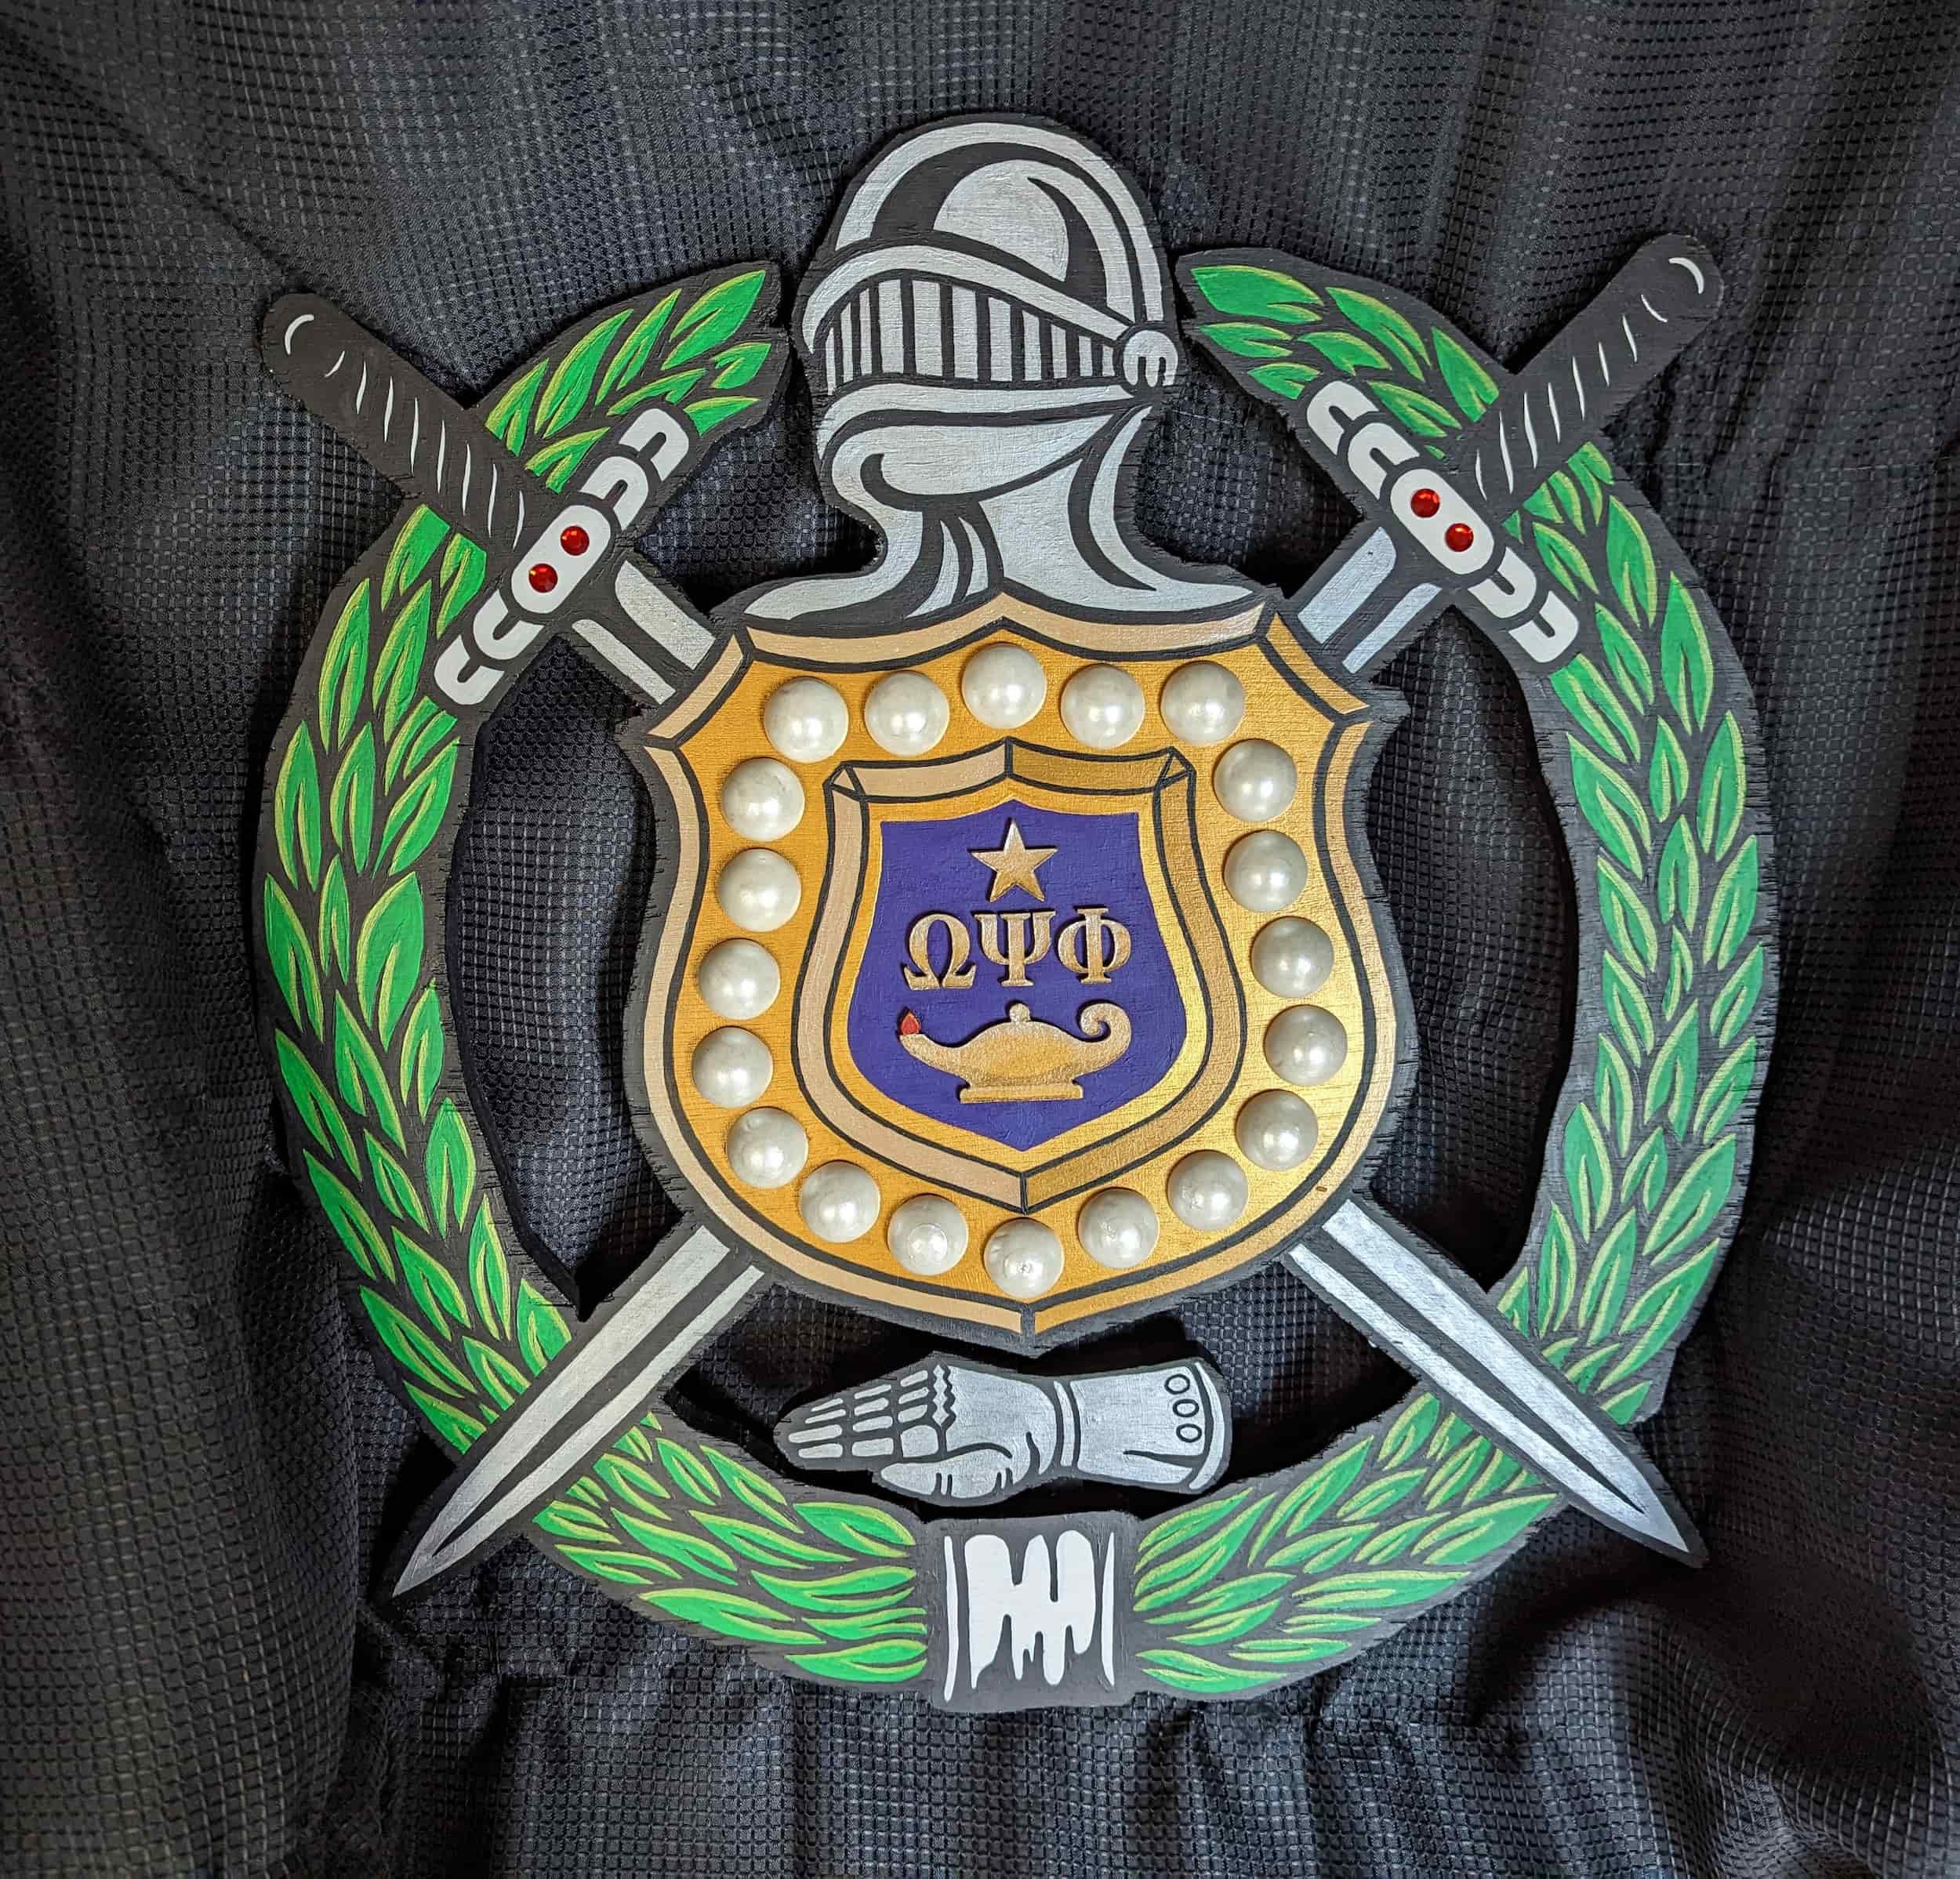
Paint
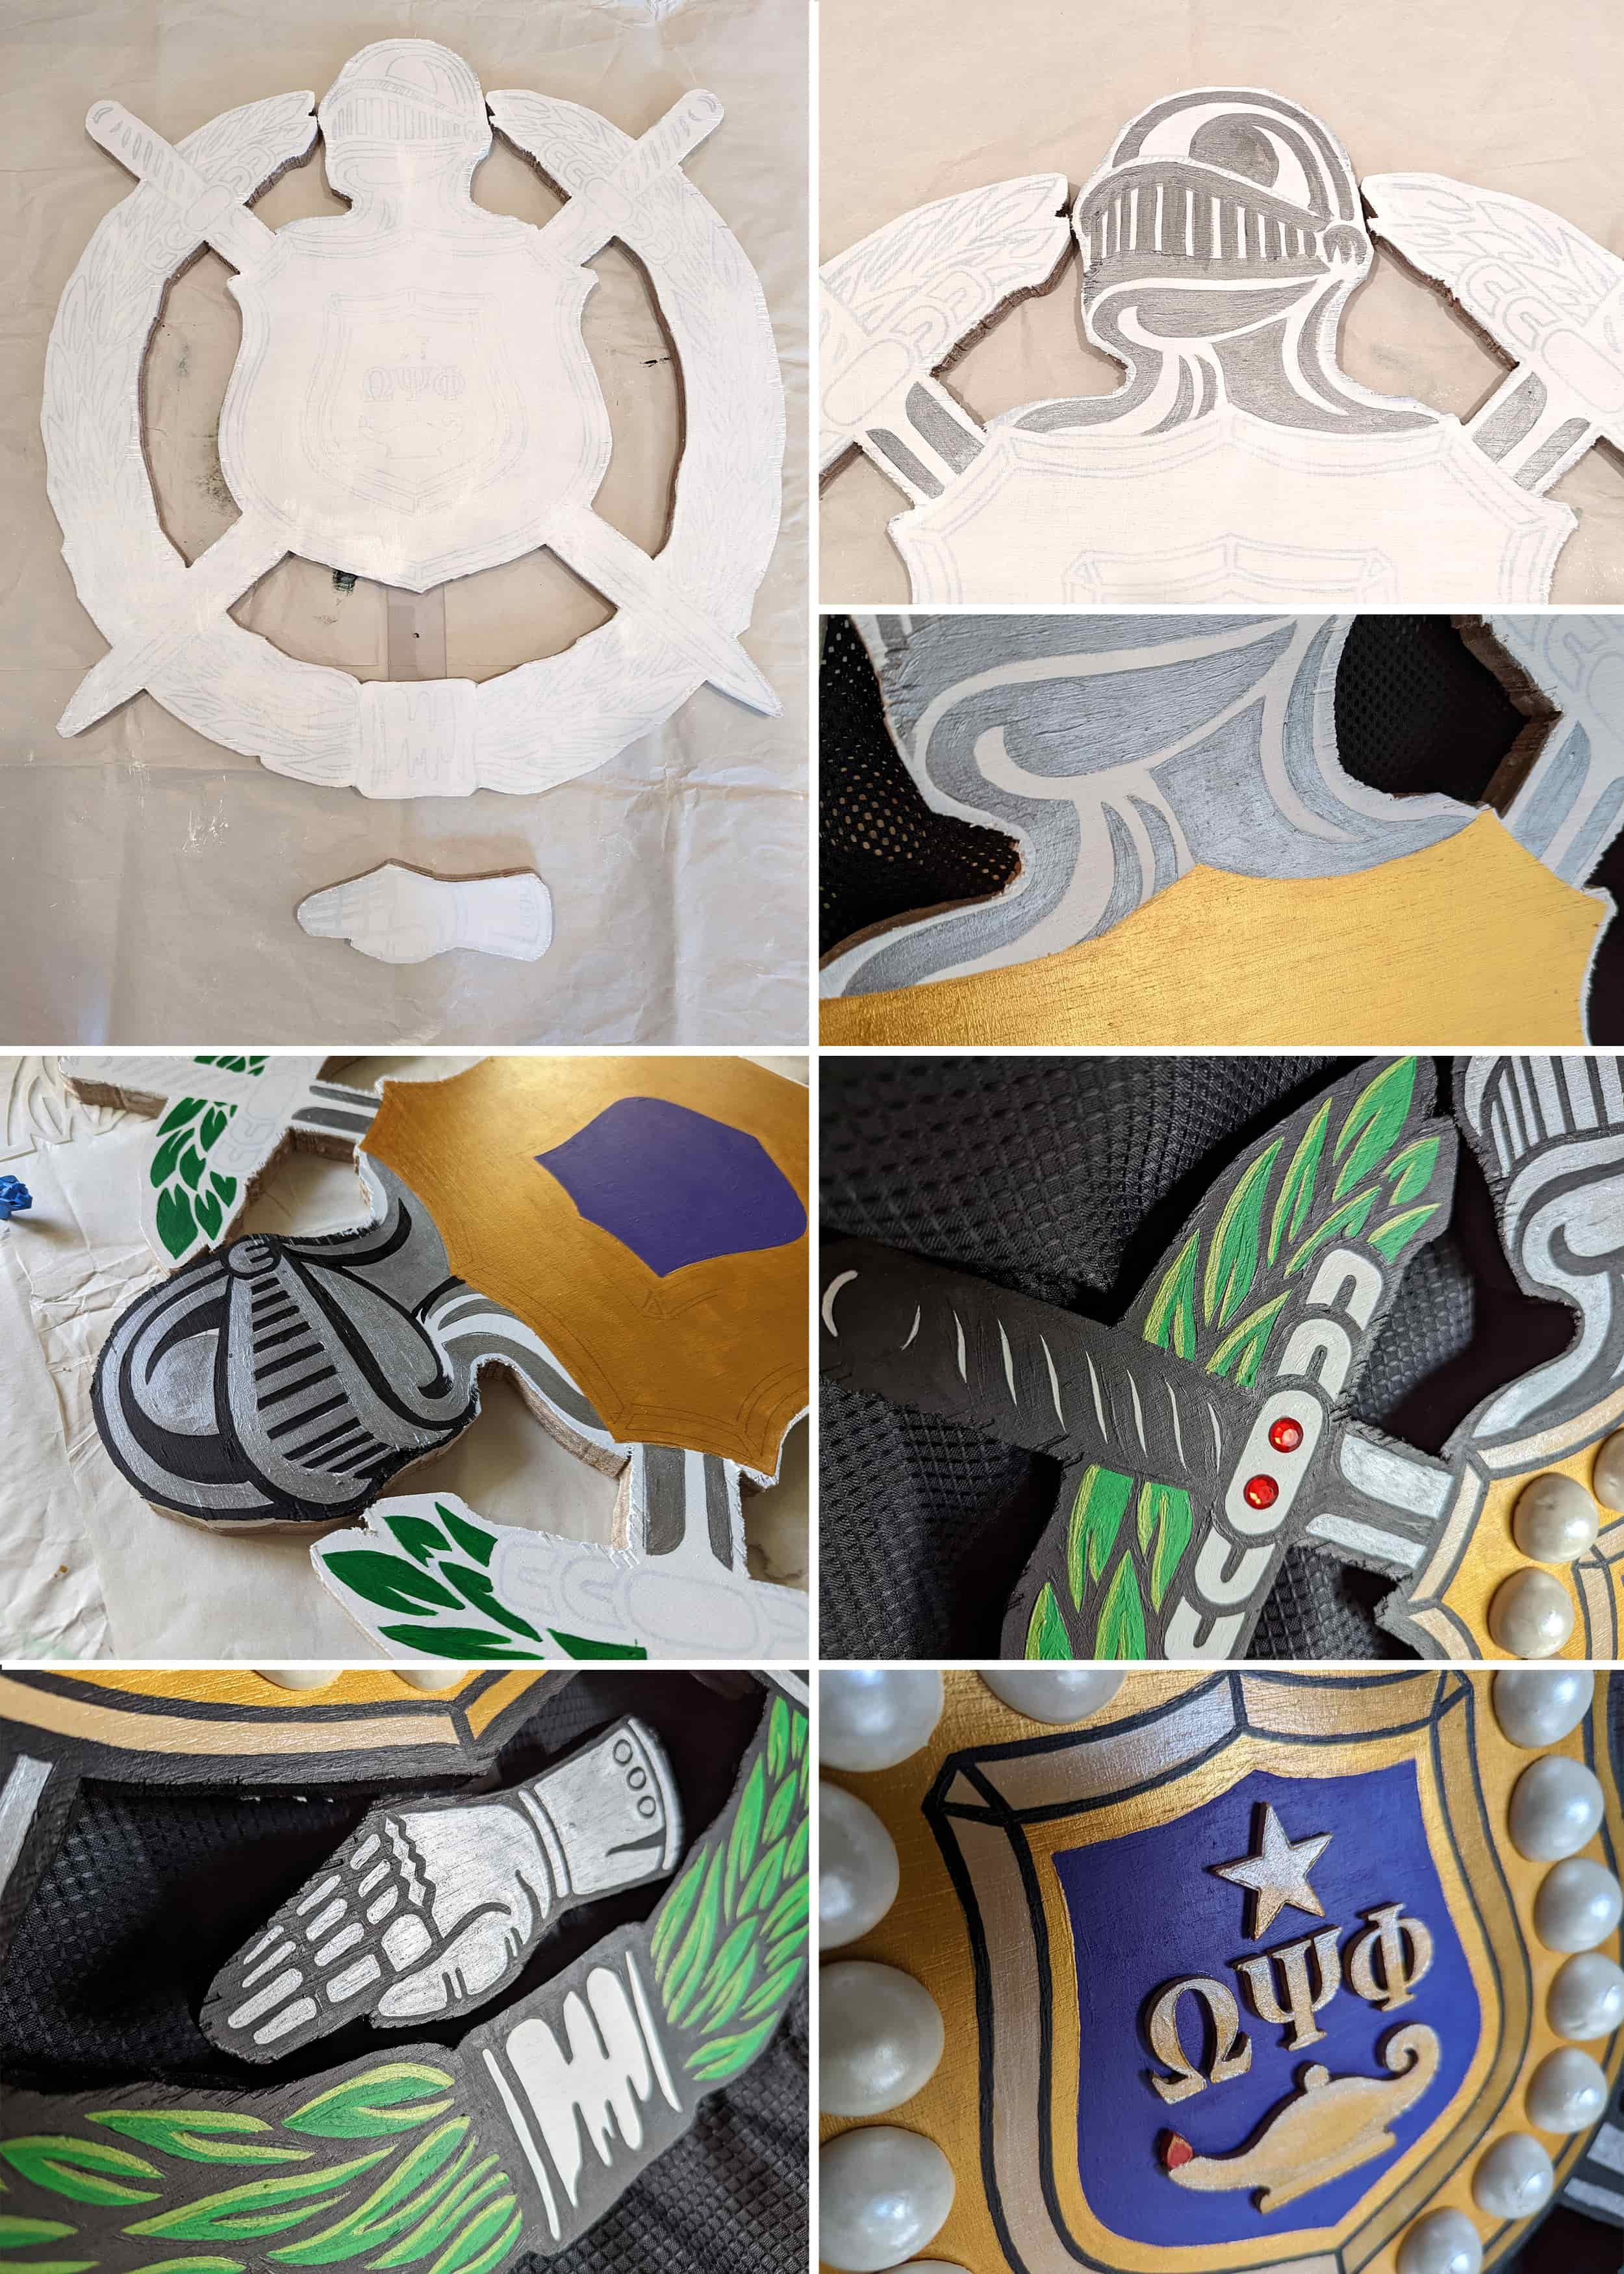
I was asked to paint a 2-foot wide sign so it could be used as an example for organization members to follow for their own versions.